EPSON Adjustment Program Reset-L3100 L3101 L3110 L3150
Content: text (16 symbols)
Available: 3
Uploaded: 07.11.2024
Positive responses: 0
Negative responses: 0
Sold: 13
Refunds: 2
$2.28
✓ Download the program EPSON Adjustment Program Reset L3100 L3101 L3110 L3150 from one of the links:
google drive ➡ https://drive.google.com/drive/folders/1wqkBWF0FOqguiA99D6lhfyj1N86RuIBK?usp=sharing
cloud ➡ https://cloud.mail.ru/public/StRn/acTHNjenC
jan.disk ➡ https://disk.yandex.ru/d/mL_x2zWMcbhqyQ
Activation Instructions For The Downloaded EPSON Adjustment Program Reset L3100 L3101 L3110 L3150
1. Open the app “Adjprog.exe ”.
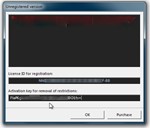
2. A new window with the license ID will appear, copy the code under the label License ID for registration, which looks like this: NN10-2***-****-****-****-****- BB
3. Send this ID code to the form to fill out in order to get a license key for your computer where your EPSON printer will be installed and run. Write a message in VK https://vk.com/softprogss that you have bought this product!!!
4. After payment, specify a unique code, it is required by the store! Sample code, PSF37BVEFC9C44EF and send me the code ID, during business hours (from 1 to 12 hours) I will send you a License key for registration and operation of the EPSON Adjustment Program Reset L3100 L3101 L3110 L3150. The key must be sent to the email address that you specified when filling out the product (Key) purchase form. Be careful when you write your mail to receive the goods!!!
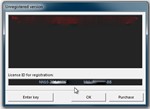
5. Next, when the “Adjprog.exe ” Press the Enter key button and paste the license key into the input window under the inscription Activation key for removal of restrictions and click "OK”:
6. Next you will see the window of the registered EPSON Adjustment Program Reset L3100 L3101 L3110 L3150:
That´s it! Enjoy your use!;)
Instructions for resetting the "diaper" using the Adjustment Program Reset Epson L series reset the diaper, ink counter
1. Run the program by double-clicking on the file Adjprog.exe
2. After opening, in the program window that appears, click the Select button
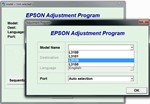
3.In the Model Name field, select your printer model, in our case it is Epson L222.
4.Also, be sure to select the port to which your printer is connected (for example, Auto selection). Click OK and return to the previous window.
5.Enter the service mode by clicking on the PARTIAL ADJUSTMENT MODE button
6.Find the Waste ink pad counter item and click on it with the mouse twice
7. Click the Check button to see which counter is how full, and which counter needs to be reset
8. In our case, the Main pad counter is full, to reset it, put a check mark next to it and click the Initialize button, we will reset both counters. Please pay attention to this point: if there are unpublished tasks in the print queue, then the program may hang, so do not forget to clear the print queue, in some cases, it is worth restarting the computer
9. In the next window, a notification will appear "After clicking on the OK button, the counters will be reset", so click the OK button
10.Next, you will see a notification about the need to turn off the printer with the On button.\Off. therefore, turn off the printer and turn it on again:
11.After turning on your printer, the error is "Maintenance required. Contact the service center." will not appear, the "Drop" and "Paper" indicators will stop flashing, and you will be able to continue your work, all this provided that you clearly followed the recommendations in this entry. Have a nice typing!
No feedback yet


